
Is it possible to mine Crypto with a Raspberry Pi?
If you've ever wondered if a Raspberry Pi can mine cryptocurrencies and how you can do it yourself, then you're in the right place to find out.
SPOILER
I understand that some of you may not be familiar with crypto mining and may have overly optimistic expectations about what you can achieve by mining with a Raspberry Pi. So I won't make you go through the entire tutorial just to be disappointed at the end.
Read ahead for spoilers:
I ran XMRig on the Raspberry Pi for about 3 hours before shutting it down due to the Pi getting extremely hot and not wanting to fry it. In those 3 hours of mining it generated roughly 0.000002 XMR.
According to my mining statistics at MoneroOcean website, which is the mining pool we will be using in this tutorial, it states that my Raspberry Pi has an average Hashrate of only 80H/s which will generate approximately 0.0051 XMR per YEAR. Yes, year...
0.0051 XMR is worth about £0.61
Upon factoring electricity costs you're going to be in the negatives. So please don't get ahead of yourselves and start buying a Raspberry Pi with intentions of trying to mine crypto for profit.
This project was just a fun experiment I decided to carry out with a spare Raspberry Pi that was donated to us here at DustyBugger by a subscriber.
Shout out to them for making this possible!
Today we will be running a fun experiment to see if a raspberry pi can successfully mine Monero(XMR). If you've never heard of Monero before then here a very brief explanation of what it is:
Monero is the leading cryptocurrency focused on privacy with a non-transparent blockchain that makes all transactions confidential and untraceable. This gives all users anonymity by default.
You can read more about Monero here.
Why Monero instead of Bitcoin?
Apart from the fact that I am a Monero enthusiast, who loves the idea of private and anonymous transactions instead of having every transaction you make permanently ingrained on a public blockchain for all to see, the other reason I chose to mine Monero over Bitcoin(or other cryptos) is because of their RandomX algorithm.
Unlike Bitcoin's SHA-256 algorithm, Monero's RandomX algorithm is designed to be ASIC resistant, this means that you cannot use specialised hardware to give you an advantage over others when mining. This supports a more equal and decentralised blockchain and will also give our small and not so powerful Raspberry Pi it's best chance at mining some crypto.
Equipment List
Required:
- A PC with an Internet Connection.
- Raspberry Pi (Higher RAM will help)
- Power Supply
- Micro SD Card (At least 4gb recommended)
- Micro SD Card Reader (If your PC doesn't have one already)
Optional:
- Ethernet cable (If not using WiFi)
- Wi-Fi Adapter (For older Pi models without built in WiFi)
Other Requirements
Access to your router's admin panel is required for the method in this article.
Alternative Method
If you do not have access to your router's admin panel or would just rather a different method, you will require a Micro HDMI to HDMI cable, a HDMI compatible monitor, and peripherals such as a keyboard and mouse.
The method will change for you as you will need to download and write the full 64 bit desktop OS to your Micro SD card instead of Lite version and you will not need to SSH remotely into the Pi.
You will then insert the SD card and power up the pi with your monitor and peripherals attached. Go through the initial set up after first launch and set up the WiFi or Ethernet connection.
Then you can open up the command line and follow along from:
Setting up the Raspberry Pi
1. Download Imager
First we need to download the Operating System for our Pi. On your PC go to the official Raspberry Pi website and download the Raspberry Pi Imager:
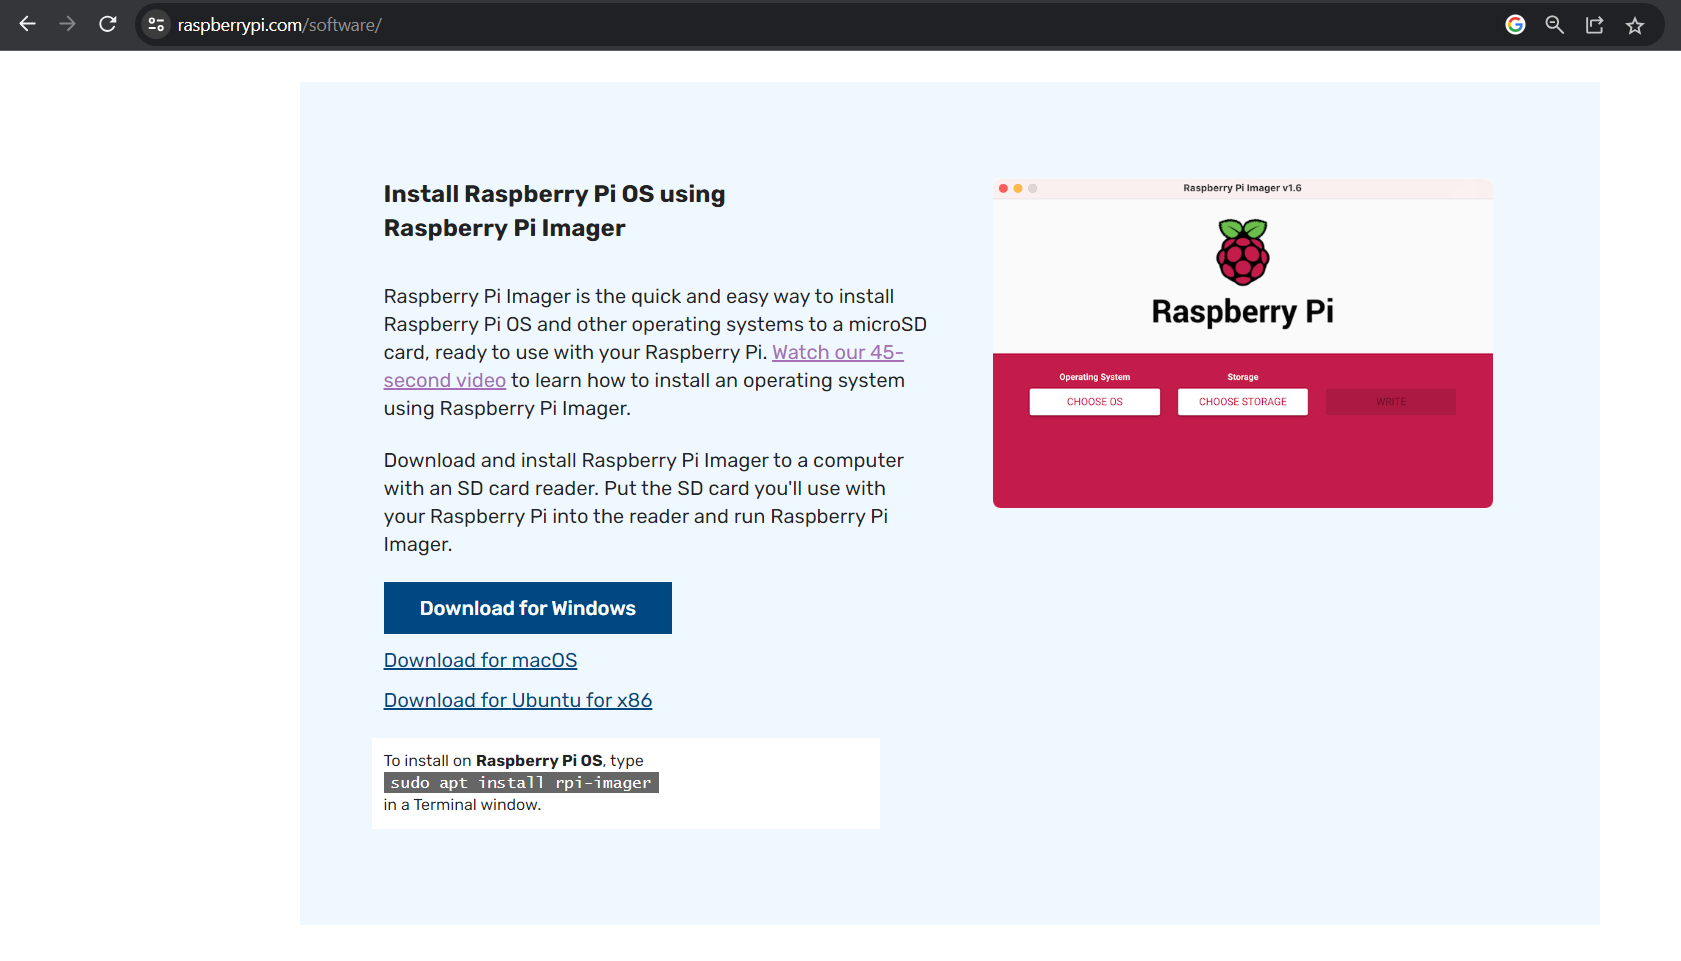
This will allow us to write the OS directly to our Micro SD card and also allow use to set up WiFi and SSH access so we can connect to our Raspberry Pi even if we don't have a monitor.
2. Choose Operating System
Once installed, launch the Imager and you will see something similar to this:
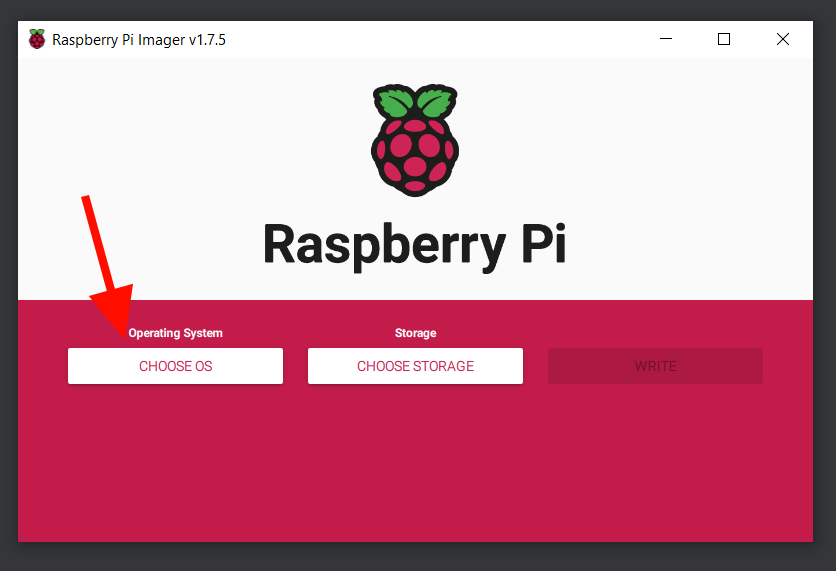
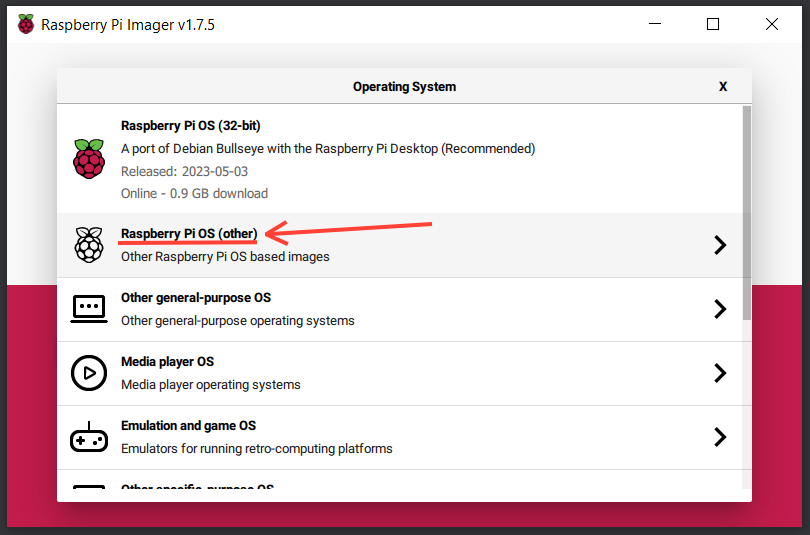
Now put your Micro SD card into your Micro SD card reader and into your PC. Then select "Choose OS", and then select "Raspberry Pi OS (other)":
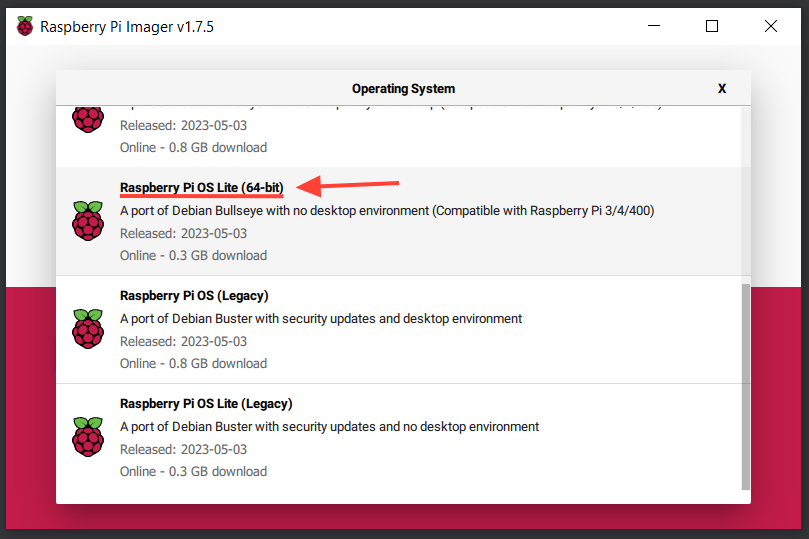
Then scroll down and select, "Raspberry Pi OS Lite (64-bit)". I am choosing the Lite OS simply because it allows everyone following this tutorial to set up the pie and start mining crypto even if they do not have a monitor for their Raspberry Pi but if you want the full desktop OS version or a completely different OS then that is fine.
However it is very important that you select the 64-bit version of whatever you choose.
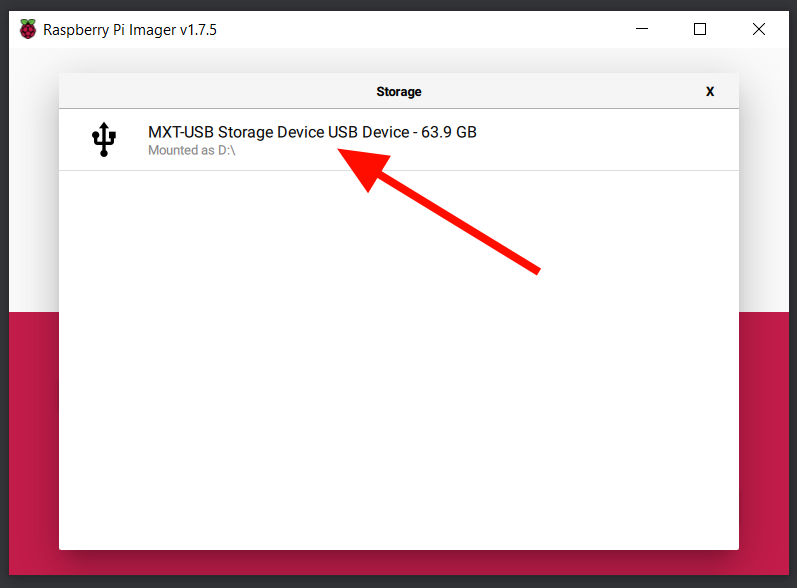
3. Choose Storage Device
Once you've selected your OS you will be returned to the home page where you will now click "Choose Storage" and then select the Micro SD card you connected to your device earlier. If you are using an external USB Micro SD Card reader then it may show up as a USB device rather than a Micro SD card but don't worry as it will still work.

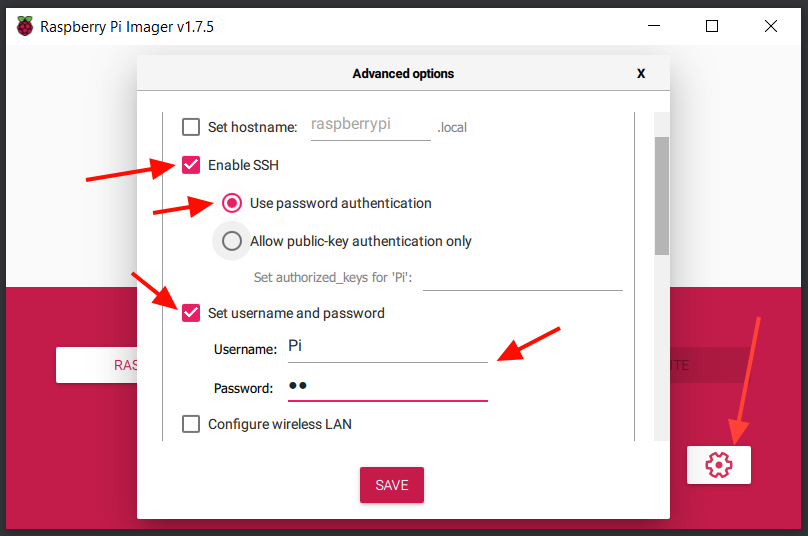
4. Setting up SSH on a Raspberry Pi
Now before clicking "Write", click on the settings button in the bottom right or press Ctrl + Shift + x to open up settings.
When the settings are open, check these boxes:
- "Enable SSH"
- "Use password authentication"
- "Set username and password"
Then enter a username and password that you can remember. These credentials will be used to remotely log in to the Pi using SSH.
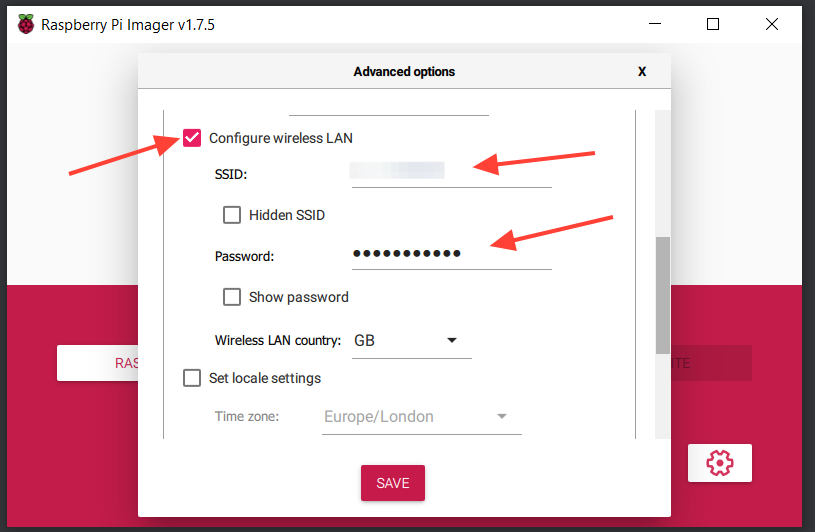
5. Setting up WiFi on a Raspberry Pi
(SKIP THIS STEP IF USING ETHERNET CONNECTION)
Before closing settings, scroll down from the SSH settings and check the box to "Configure wireless LAN" and then enter your network's SSID and WiFi password so that your Pi will automatically connect to your network upon booting up. These fields are usually auto filled from your current device's internet connection but if they're not then just fill them in yourself and click "Save".
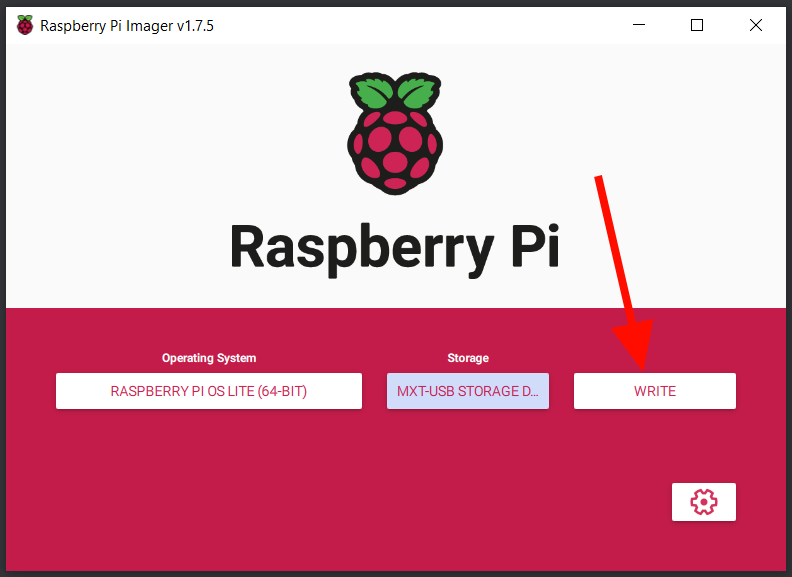
6. Write Raspberry OS to Micro SD Card
Upon saving your settings you will be returned to your home page where you can finally click "Write" to write the selected Operating System and settings to your Micro SD card.
7. Power up the Raspberry Pi
Once the WRITE process is finished, eject your Micro SD card from your device and insert it into your Raspberry Pi. To turn on your Raspberry Pi, plug in the power supply and then insert into the USB-C power slot of the Pi and it will automatically boot up.
Don't forget to plug in your ethernet cable into the Pi and the other end into your router if you won't be using WiFI.
Connecting to the Raspberry Pi
1. Accessing the Router's Admin Panel
To connect to your raspberry pi using SSH you must first know it's IP address. To find this out if you are using Lite OS and do not have a display for the pi, use another device on your home network to login to your router's admin panel.
This is usually accessible through typing the first host address of the network into your search bar, such as: 192.168.0.1
Yours may be different depending on your router and ISP but you'll be able to find it by searching up help and FAQ's from your ISP or Router manufacturer. Or you can visit setuprouter.com to see if they already have a guide to your router.
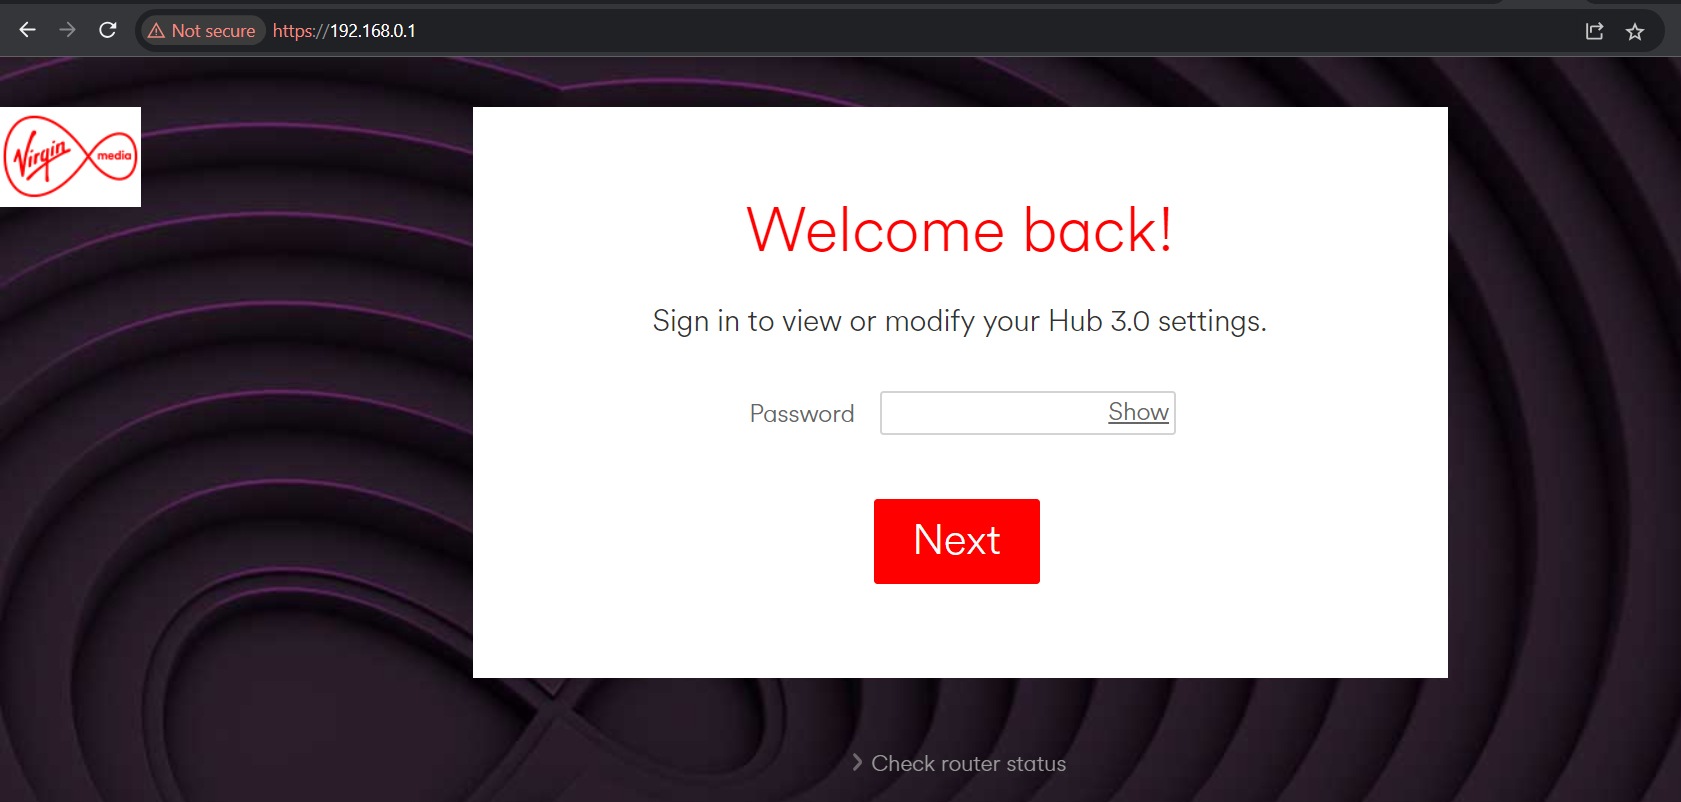
Once you have found out how to access your Router Admin panel, login using the password you set for it or the default password that is usually on a sticker on the bottom of your router.
Once logged in, navigate to the page that is usually labeled, "connected devices" and then look for a device which should be called "raspberrypi", unless you changed the hostname earlier in the settings of the Raspberry Pi Imager. Copy the IP address of the Pi and open CMD in windows or your respective command line/terminal on your PC.
2. SSH into your Raspberry Pi
Type:
ssh {username}@{IPaddressOfPi}
The username is the one you set for SSH earlier in the Imager. Then press enter and then enter the password you set. The password won't show as you type it in, it will remain blank so you just have to make sure to not mess it up and then press enter.

If successful you should now be remotely connected to your Raspberry Pi through SSH and now see this:
How to install XMRig on a Raspberry Pi
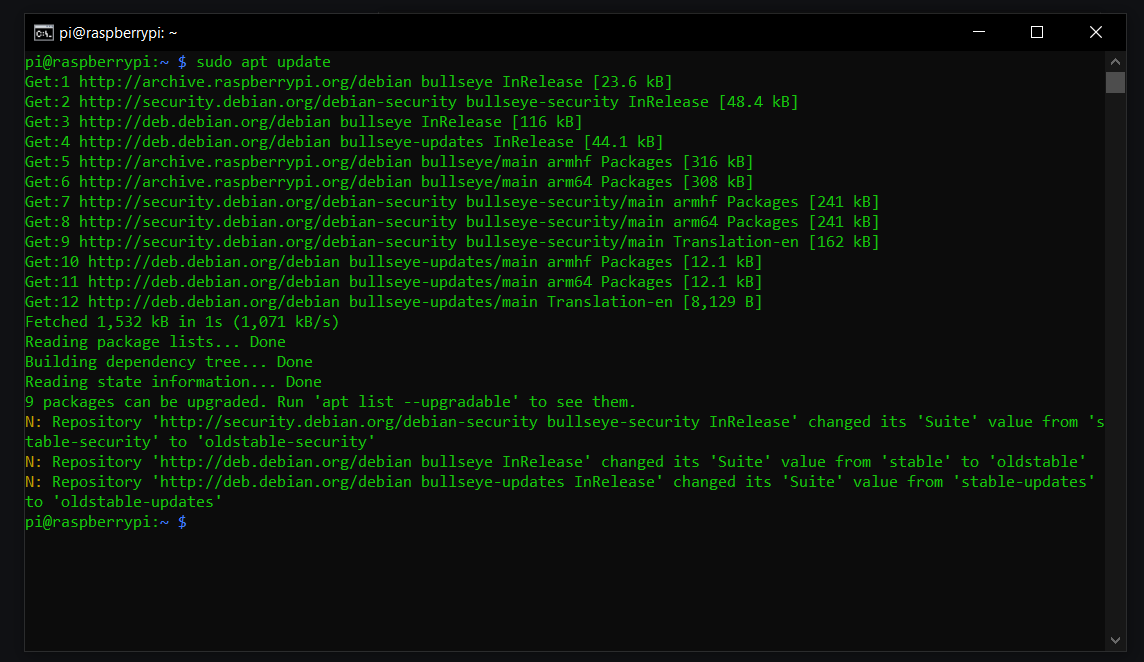
1. Updating your Pi
We will be installing XMRig onto our Raspberry Pi to be our open source crypto miner. First let's update our Pi, enter:
sudo apt updateand press enter:
2. Installing required libraries
Then run the command:
sudo apt install git build-essential cmake libuv1-dev libssl-dev libhwloc-dev -y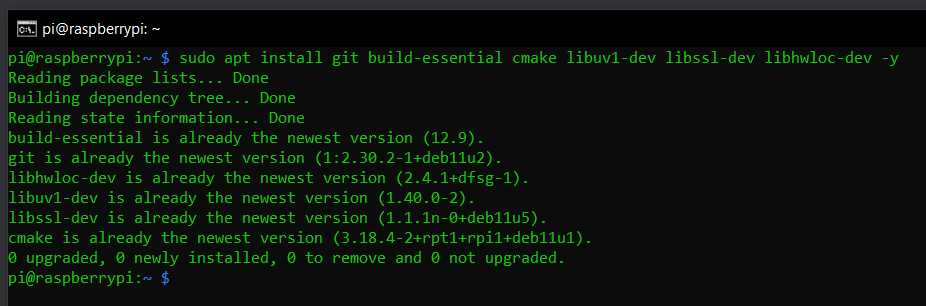
3. Cloning and Building XMRig
Then we need to use git to clone the xmrig repository:
git clone https://github.com/xmrig/xmrig.git
Now we need to change our directory to the xmrig directory by typing:
cd xmrigThen we need to make a new directory called "build" by typing:
mkdir buildNow we need to change our directory to the build directory by typing:
cd build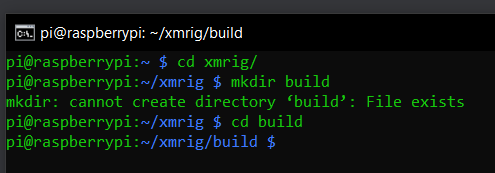
Now type:
cmake ..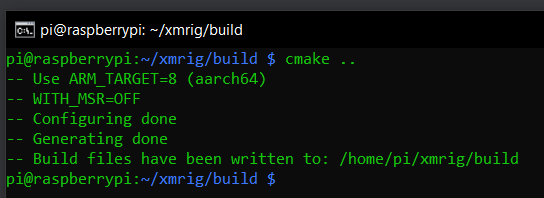
and then:
make(This one might take a while, but I've completed this previously)
Now set the Pi connection aside for a moment as we need to set up a Monero wallet for you to receive your share of the crypto you mine. There are multiple ways to do this, but two of the possible options are;
- you can use a mobile app like CakeWallet,
- or you can download one of the Official Monero wallets.
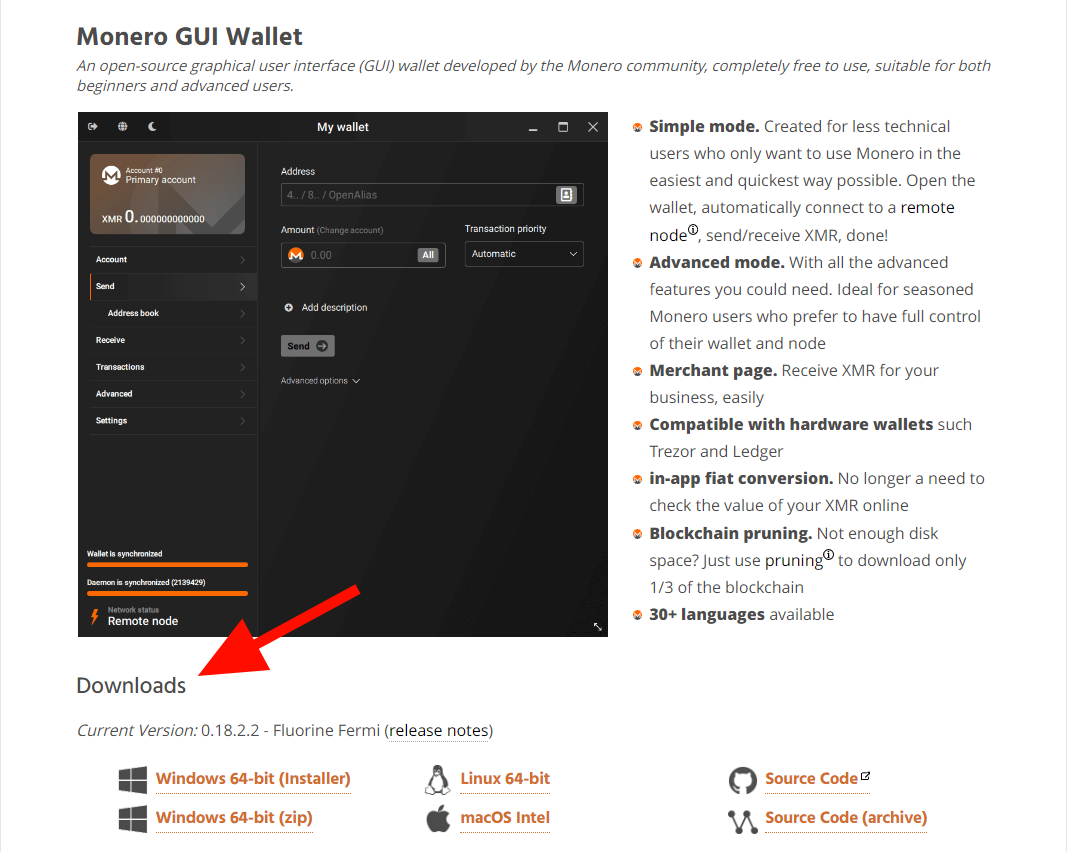
How to install the Monero GUI wallet
1. Download GUI Wallet
In this tutorial we will be using the Monero GUI Wallet. To get this, first go to:
https://www.getmonero.org/downloads/
Then download the correct version for your system and go through the installation.
2. Creating a new Monero wallet
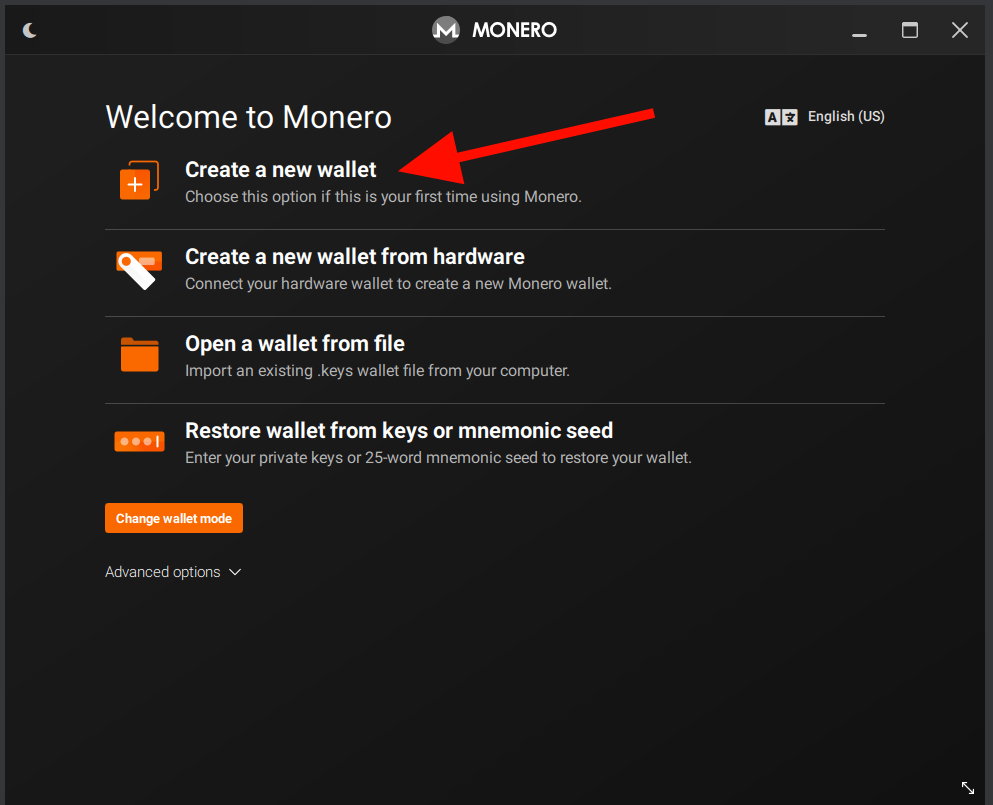
Once installed, run the GUI Wallet and select "Create new wallet":
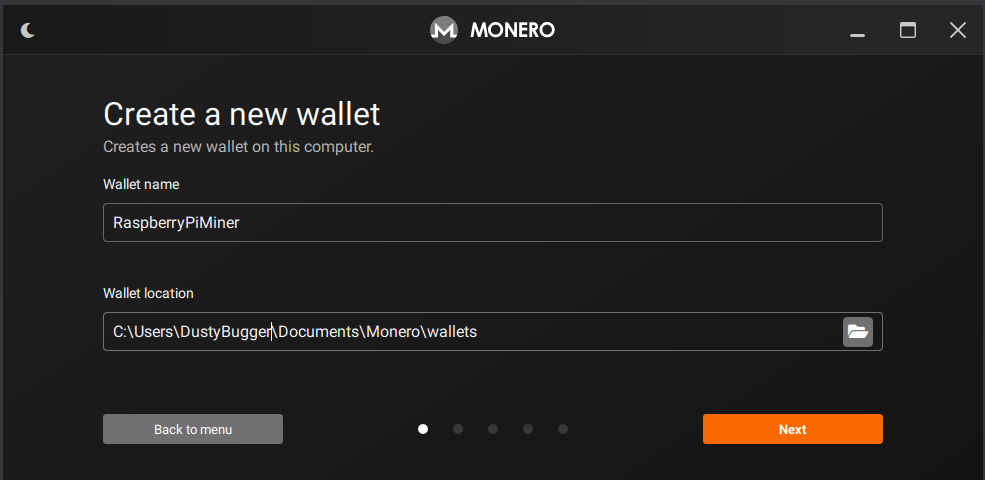
Then enter your wallet name and location:
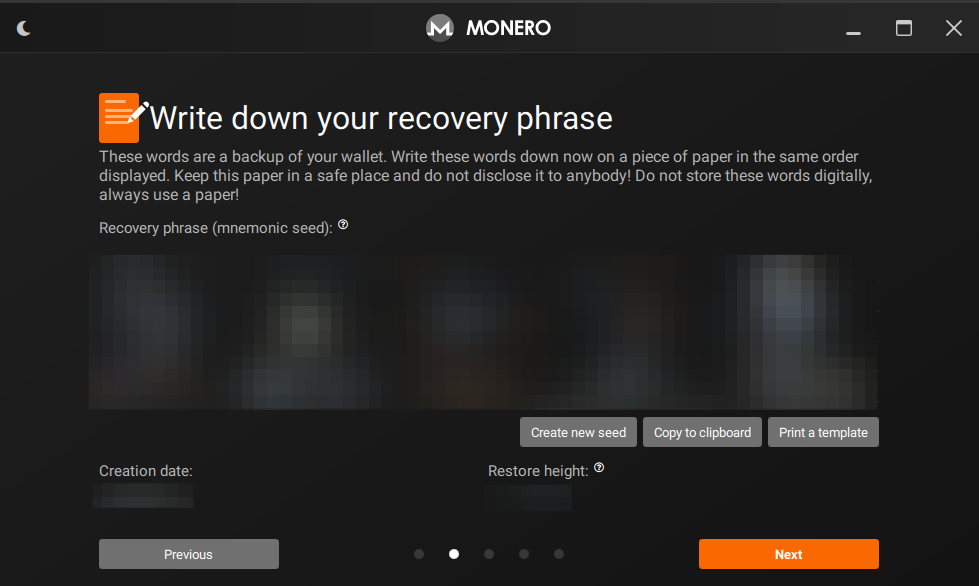
Write down your Recovery seed, Creation date and Restore height and store them securely and privately:
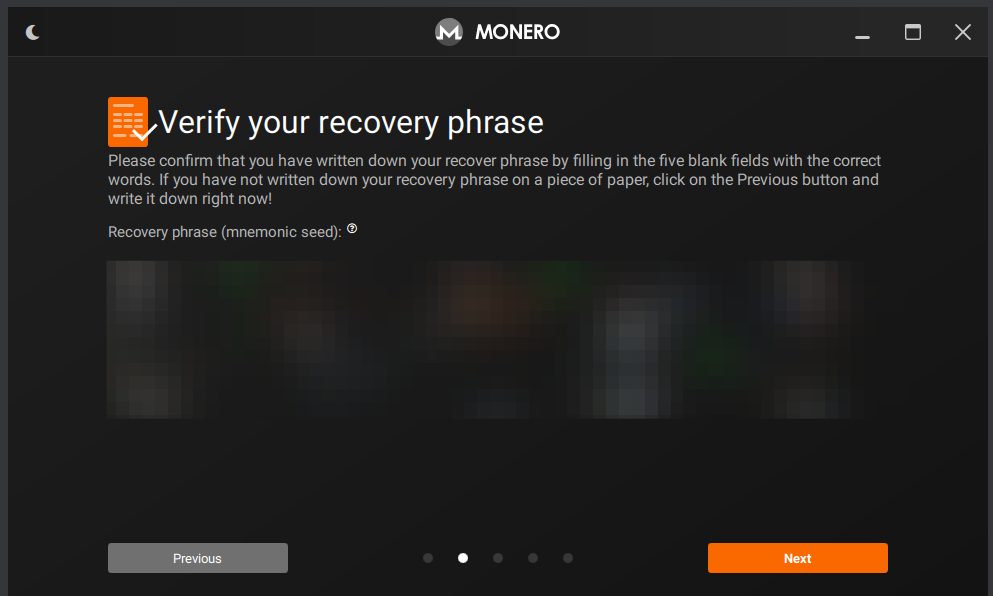
Then press next verify your recovery phrase:
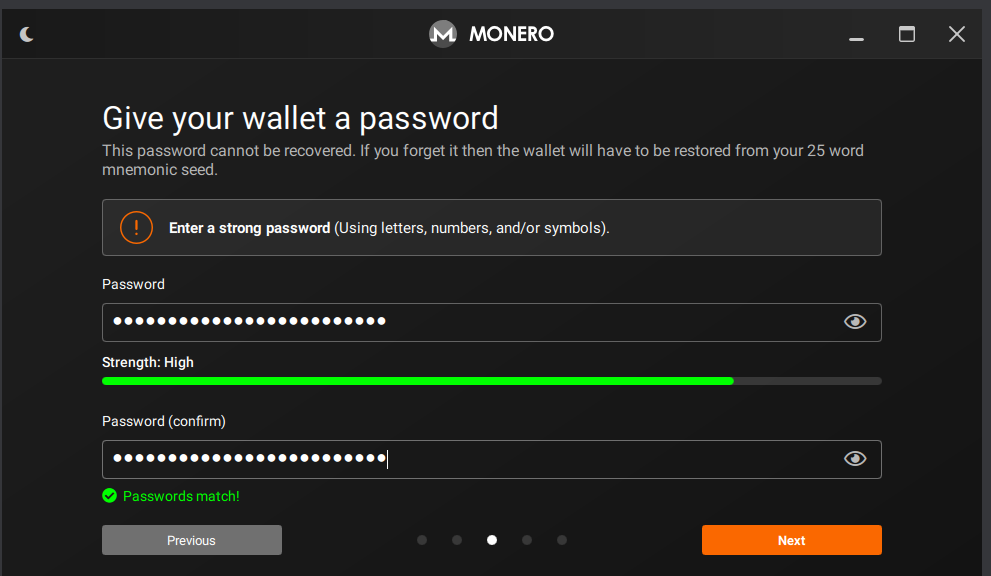
Set a strong password for your wallet:
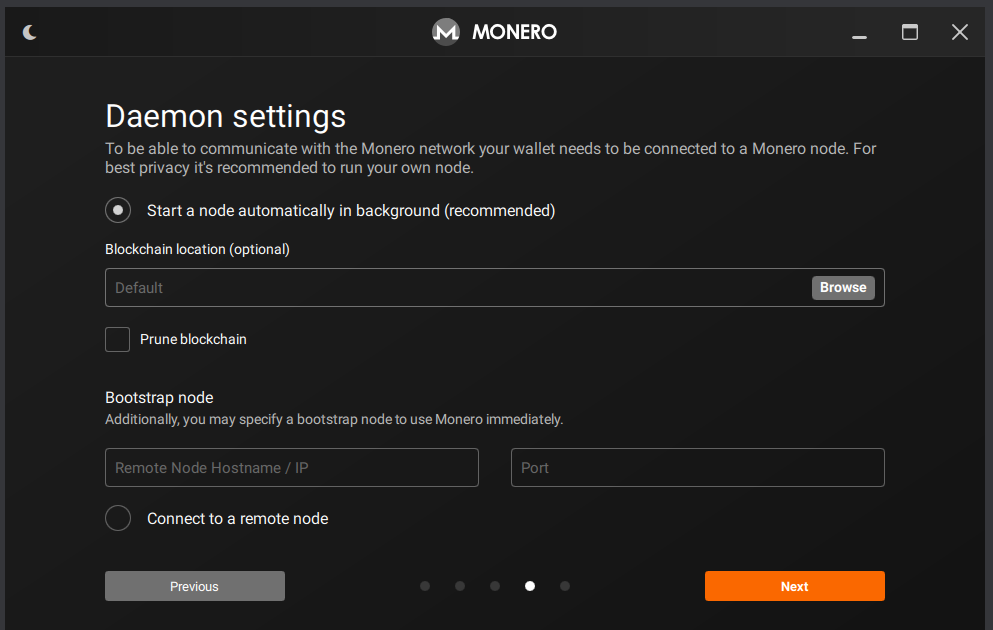
Now you have to choice of whether to start your own node or connect to a remote node. It is highly recommended to start your own node, however this can take a long time to fully download the blockchain which is currently at a size of around 150 gigabytes.
So if you don't have the time or storage for the full blockchain you can either opt to prune the blockchain so you save 2/3rds of of the storage space and save download time or you can find a remote node online to connect to.
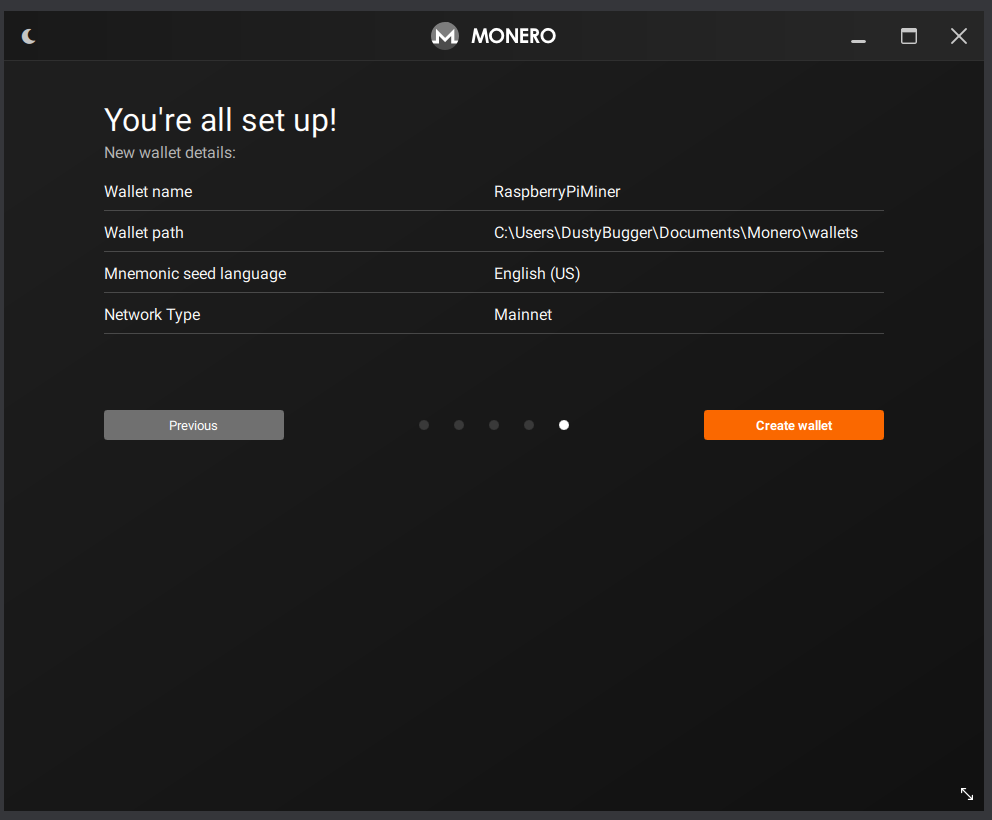
Now confirm all your details and create your wallet:
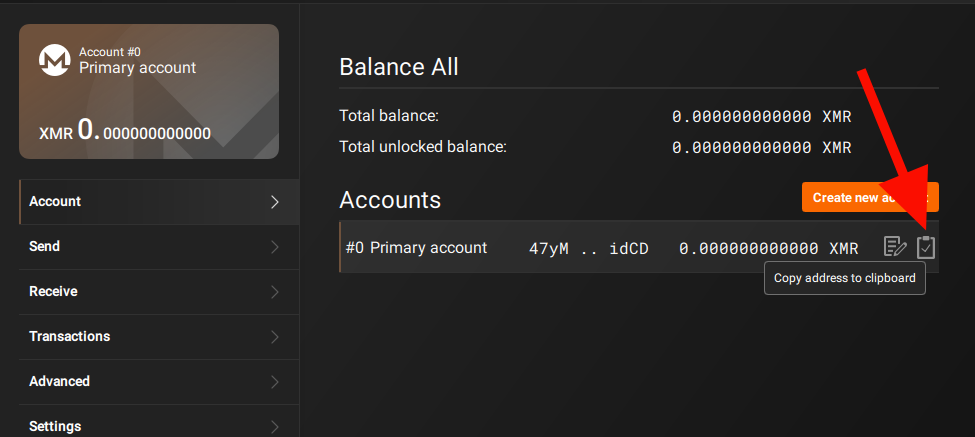
Now enter your password and you will be logged into your very own Monero wallet. Now copy your wallet address and we can start mining:
How to start mining with XMRig?
To start all we have to do is go back to our Raspberry Pi SSH connection and enter the following command but with your wallet address:
KEY:
./xmrig -o {miningPool} -u {walletAddress} -p {minerName}

COMMAND EXAMPLE:

./xmrig -o gulf.moneroocean.stream:80 -u 47yMw1DFumy3KVQbmQgFrYVbMqL64zAediiEMhwuyS3y9aEqe7LoBhE7QAdrwos3cthyEvYvz2x8gfo4Jc4S6wymTMnidCD -p RaspberryPi
Run xmrig by specifying the Mining Pool, Wallet Address and Miner Name
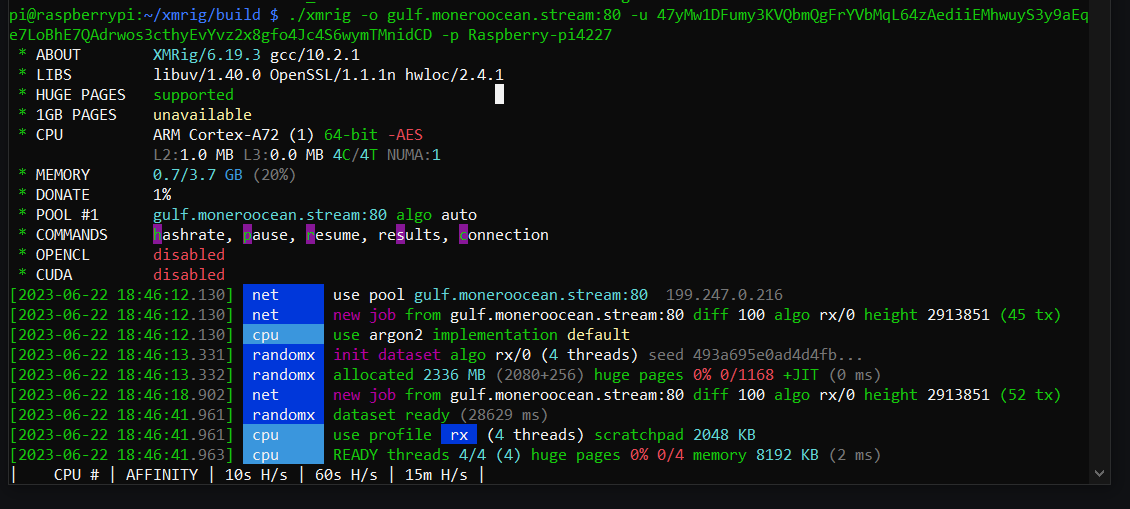
Congrats! Now you have successfully started mining Monero with a Raspberry Pi.
How to check XMRig mining progress
There are a few commands you can use to check your mining status and progress with your Raspberry Pi.
1. Check your mining progress
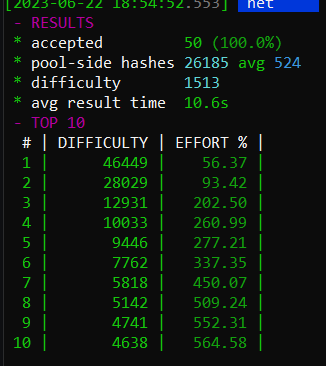
The first one is checking your mining results. To do this simply click into the CMD console where you have the SSH Pi connection and mining running and press the letter "S" on your keyboard. When you've only just started mining you'll see the output, "no results yet":

But after a while of mining you'll start to see an output similar to the image below, which shows your accepted mined shares and some other statistics:
2. Check your Hash Rate
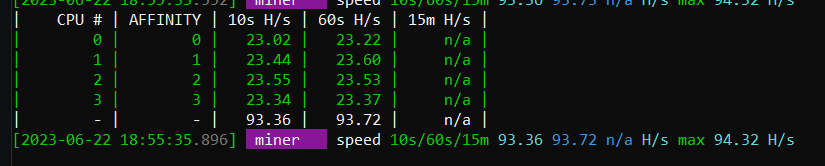
The next command is to press "H" to see your stats on Miner speeds across all of your CPU cores and also in total:
3. Check your mining connection
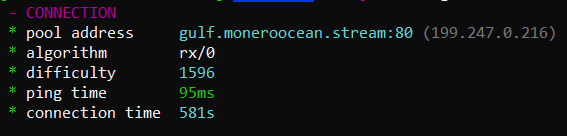
The third command is to press "C" to see information about your pool and mining connections as seen below:
4. Use the MoneroOcean Website instead
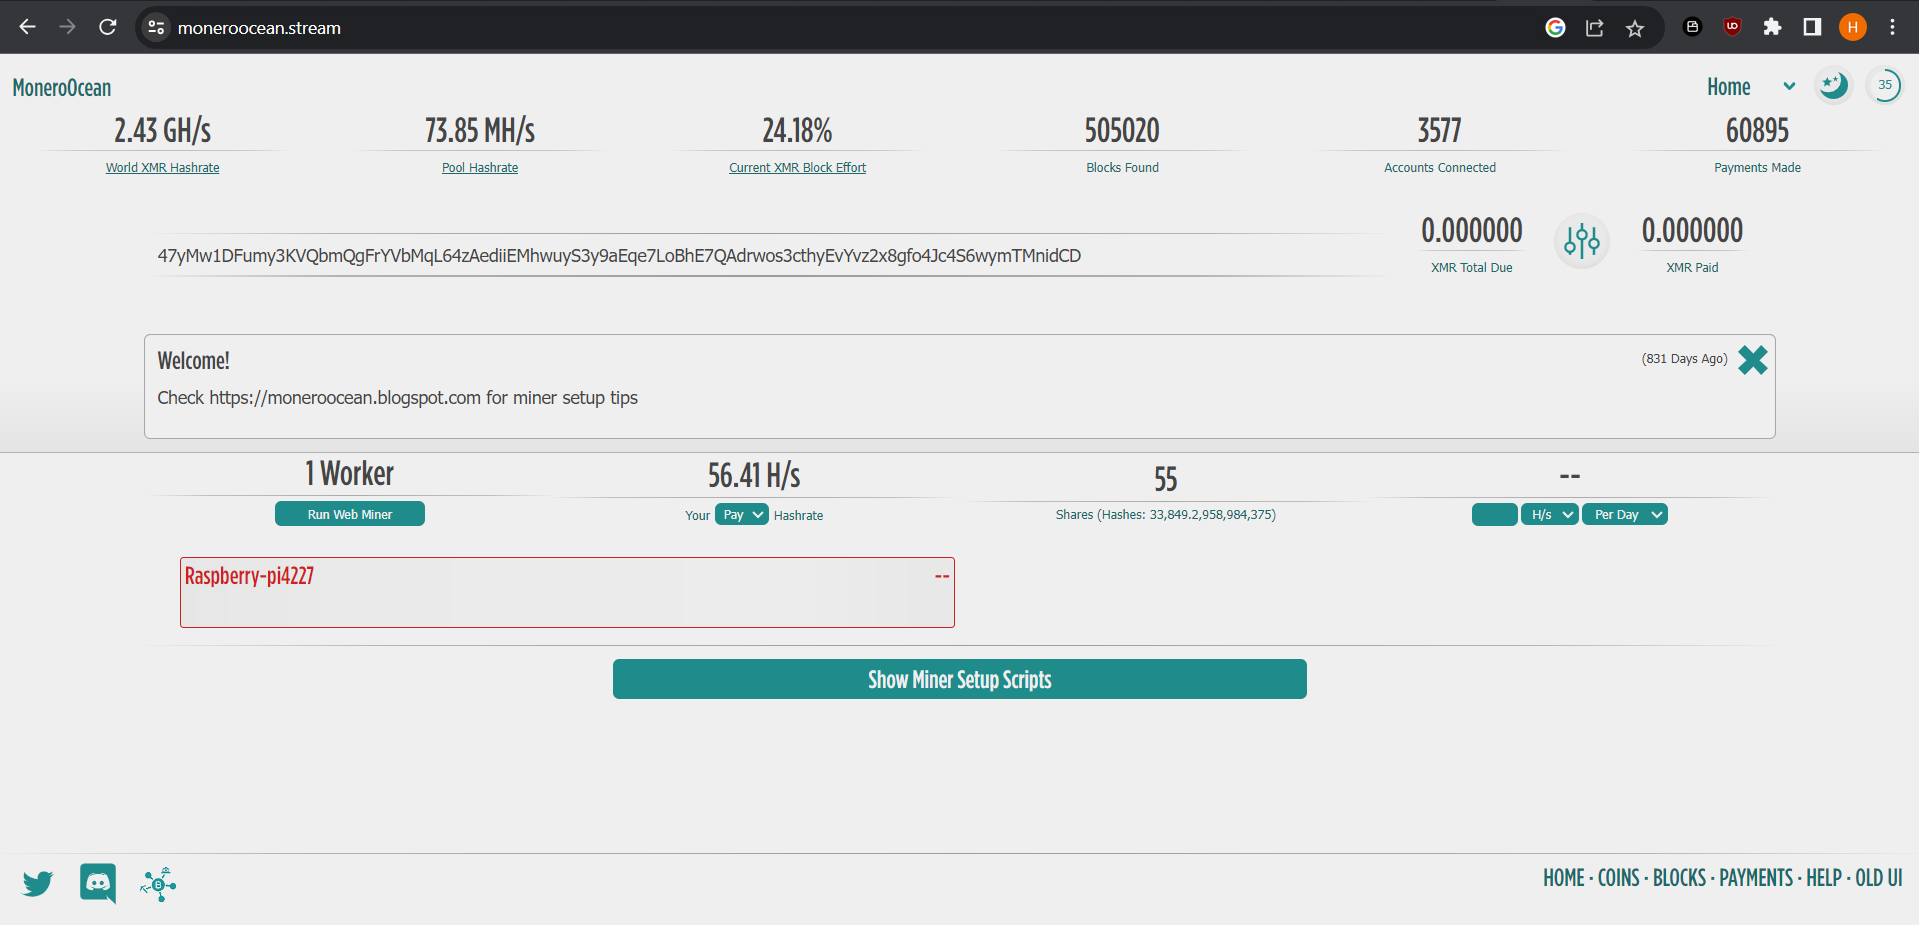
If you'd rather not check your progress in the chaotic command prompt then you can visit the MoneroOcean website and enter the wallet address affiliated with your workers to be able to see how many accepted shares you've mined, your average hashrate over time, how many workers you have actively mining and how much Monero you are owed.
You can also set up email notifications, for your workers and change the minimum payment threshold. By default you must earn 0.3 XMR to get it paid out to your wallet, but you can change this to a minimum of 0.003 XMR. There are also no fees in this pool.
How to stop mining with Raspberry Pi
To stop mining on your Raspberry Pi click on the terminal and press:
Ctrl + C

To disconnect from the Raspberry Pi SSH connection, type:
exit

Results
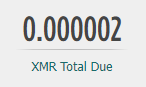
I ran XMRig on the Raspberry Pi for about 3 hours before shutting it down due to the Pi getting extremely hot and not wanting to fry it. In those 3 hours of mining it generated roughly 0.000002 XMR.
According to my mining statistics at MoneroOcean website, which is the mining pool we will be using in this tutorial, it states that my Raspberry Pi has an average Hashrate of only 80H/s which will generate approximately 0.0051 XMR per YEAR. Yes, year...
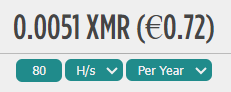
0.0051 XMR is worth about £0.61 0r €0.72.
Upon factoring electricity costs you're going to be in the negatives. So please don't get ahead of yourselves and start buying a Raspberry Pi with intentions of trying to mine crypto for profit.
Nevertheless this was a fun project to experiment with, maybe one day I'll risk the chance of incinerating the Raspberry Pi by leaving it mining for a full year (or until it dies). Or maybe I'll buy 100 Pi's to simultaneously mine together.
I hope you enjoyed this tutorial and had fun experimenting with this project yourself. Comment what Pi projects I should make next!