How to install Raspberry OS on a Raspberry Pi
— Dusty

Equipment List
Required:
- A PC with an Internet Connection.
- Raspberry Pi
- Power Supply
- Micro SD Card (At least 4gb recommended)
- Micro SD Card Reader (If your PC doesn't have one already)
If using Desktop Environment:
Optional:
- Ethernet cable (If not using WiFi)
- Wi-Fi Adapter (For older Pi models without built in WiFi)
- Case
How to Install Raspberry OS
1. Download Imager
First we need to download the Raspbian Operating System for our Pi. On your PC go to the official Raspberry Pi website and download the Raspberry Pi Imager:
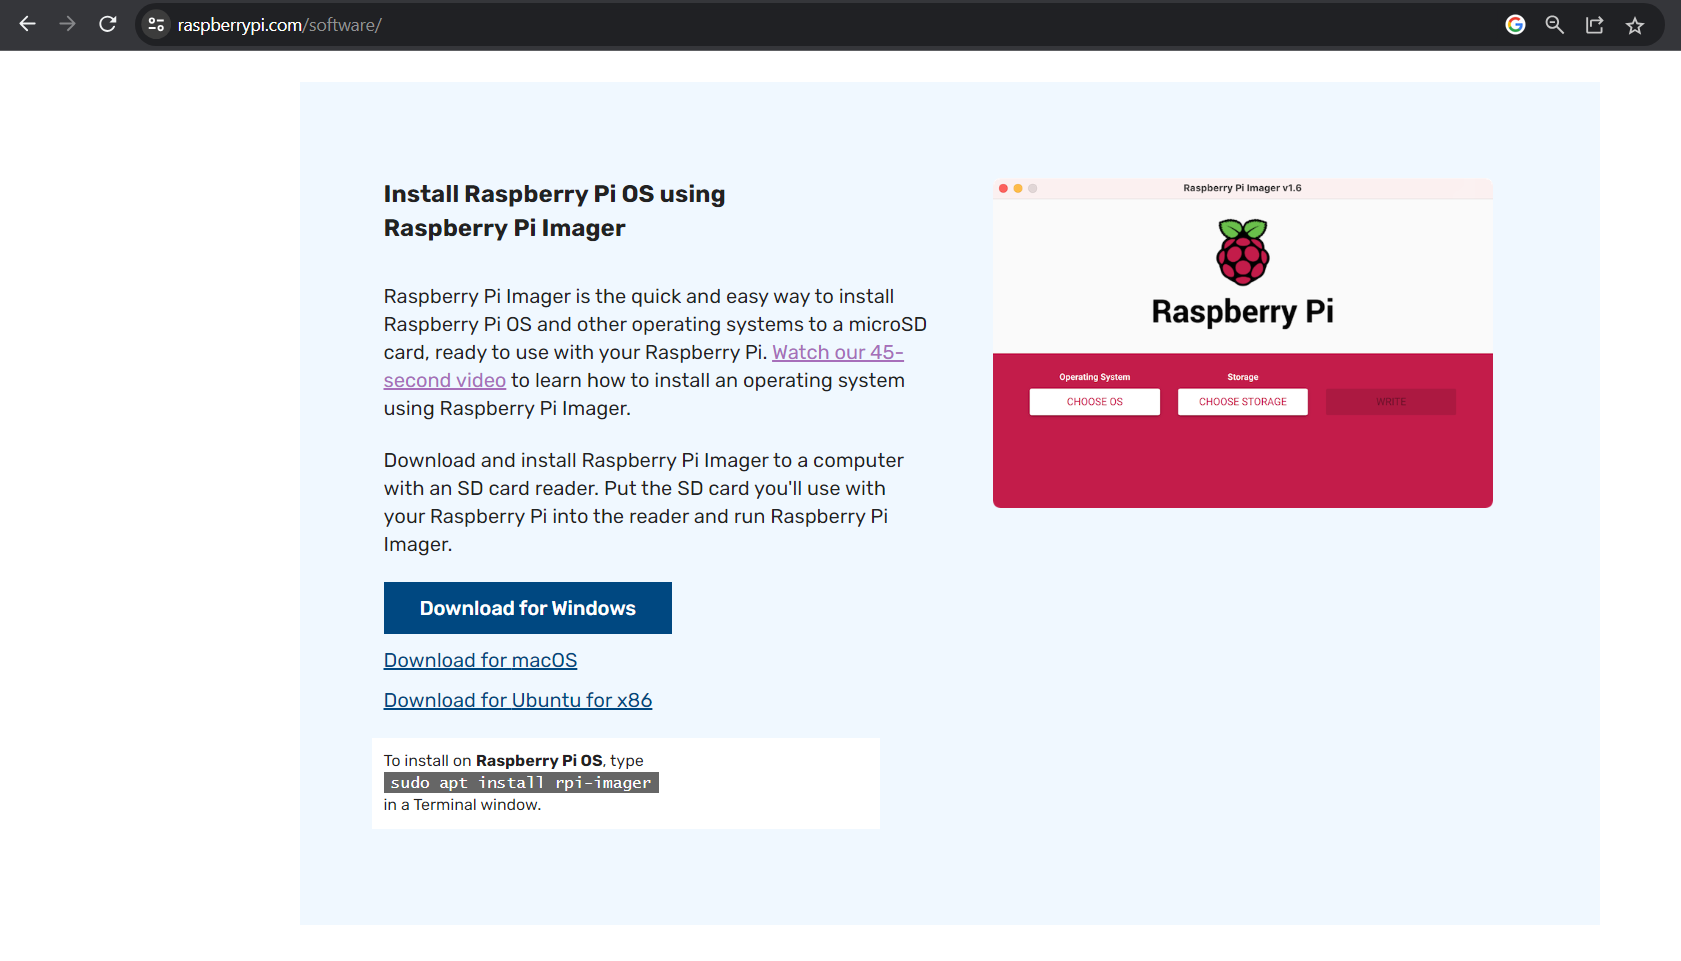
This will allow us to write the OS directly to our Micro SD card without needing to download the OS image separately.
2. Choose Operating System
Once installed, launch the Imager and you will see something similar to this:
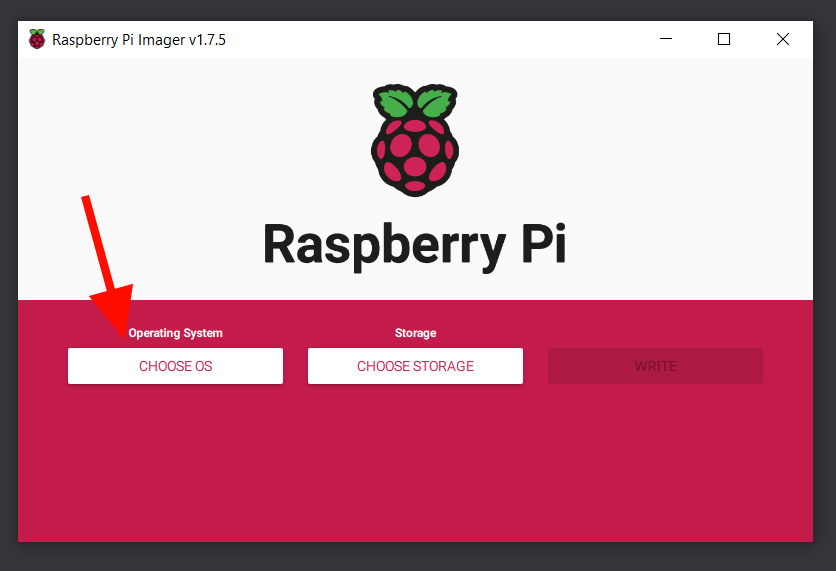
Now insert your Micro SD card into your Micro SD card reader and into your PC. Then select "Choose OS", and then select "Raspberry Pi OS (other)":
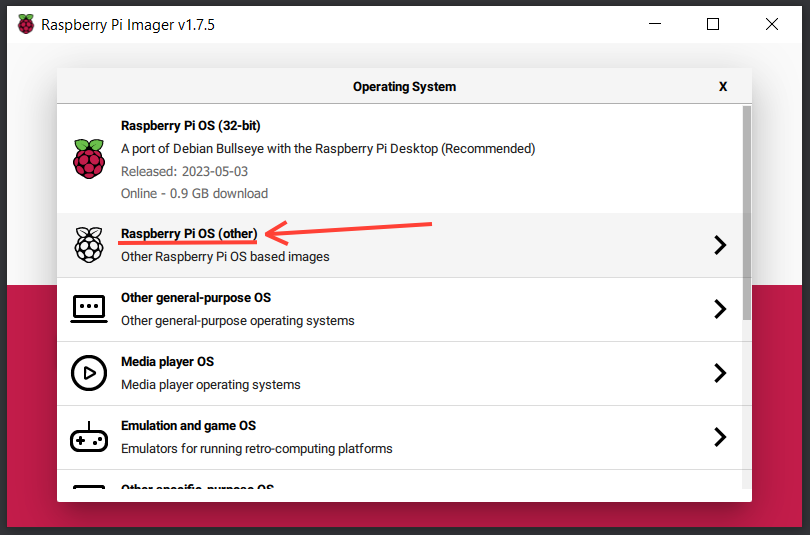
This will let you see all the currently available versions of Raspberry OS. If you have a monitor and other peripherals you want to use in a desktop setup then choose either the 32-bit or 64-bit versions of "Raspberry Pi OS".
If you do not have a desktop environment and intend to access your Pi remotely through SSH then select either the 32-bit or 64-bit version of "Raspberry Pi OS Lite".
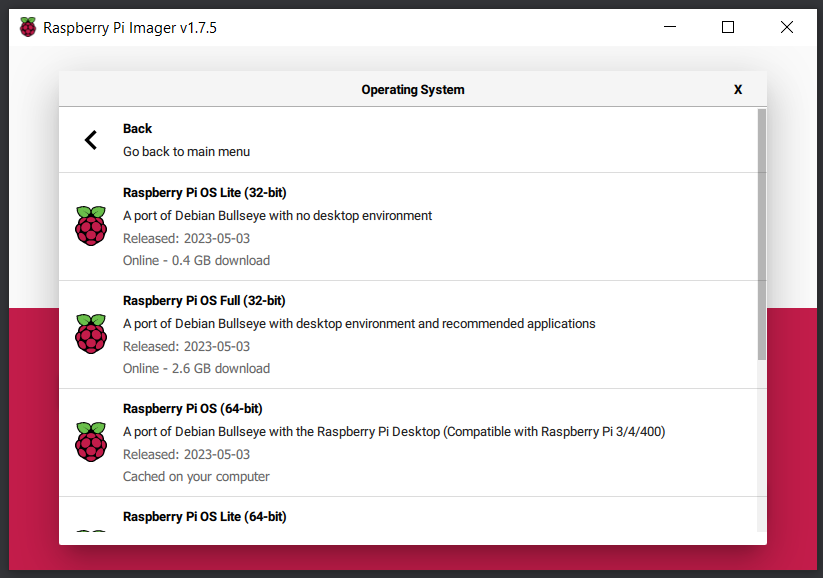
Depending on what you wish to do with and install on your Raspberry Pi the 64-bit versions may allow for better performance due to being able to access more RAM and it also performs better in CPU intensive processes. It also obviously comes with compatibility with 64-bit programs.
However depending on the version of your Pi, older models with older CPU's may only support the 32-bit OS due to their 32-bit architecture.
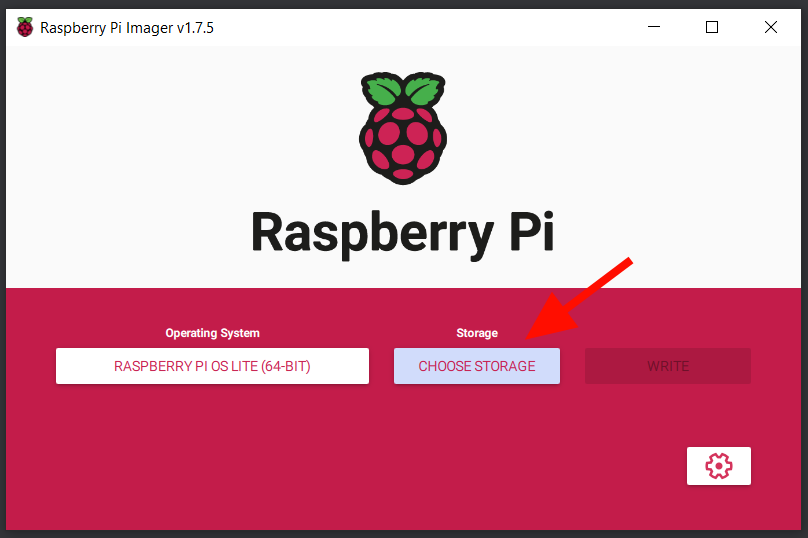
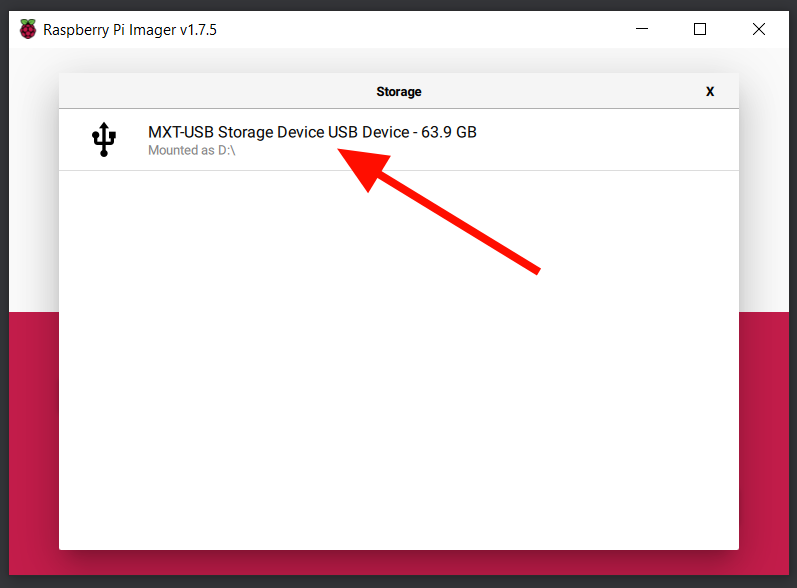
3. Choose Storage Device
Once you've selected your OS you will be returned to the home page where you will now click "Choose Storage" and then select the Micro SD card you connected to your device earlier. If you are using an external USB Micro SD card reader then it may show up as a USB device rather than a Micro SD card but don't worry as it will still be writing the OS to the SD card.
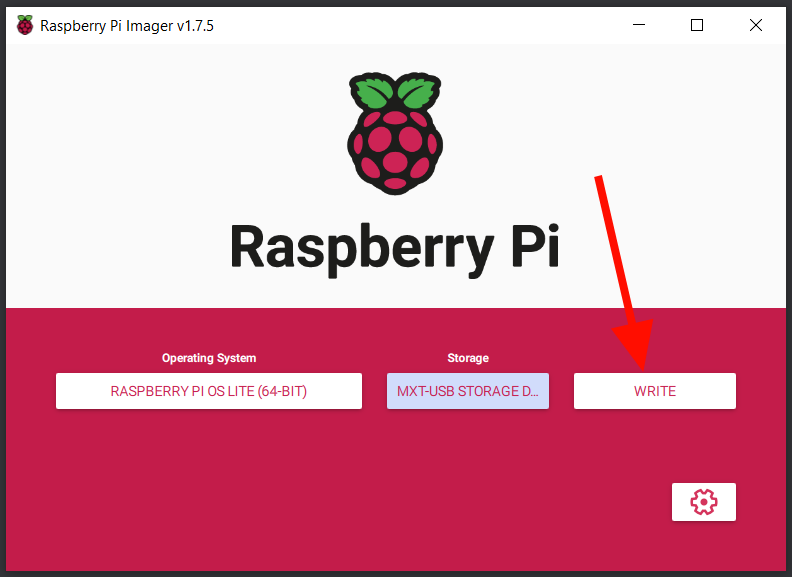
4. Write Raspberry OS to Micro SD Card
If you have chosen the Light OS and intend to access your Pi through SSH without a desktop environment then to continue please read this article on:
How to enable SSH and WiFi on a Raspberry Pi without a monitor
Otherwise, upon having selected your storage device you will be returned to your home page where you can finally click "Write" to write the selected Operating System to your Micro SD card.
Power up the Raspberry Pi
Once the WRITE process is finished, eject your Micro SD card from your device and insert it into your Raspberry Pi. Then plug in your Micro HDMI to HDMI cable into your Pi and monitor and also plug in your other peripherals such as a keyboard and mouse.
Then, to turn on your Raspberry Pi, plug in the power supply and then insert it into the USB-C power slot of the Pi and it will automatically boot up.
Don't forget to plug in your WiFi adapter for older Pi models or your ethernet cable into the Pi and the other end into your router if you won't be using WiFi.