How to enable SSH and WiFi on a Raspberry Pi without a monitor
— Dusty

In this article we will be covering how to enable SSH and WiFi on a Raspberry Pi without a monitor so that you may still access and put your Pi to use without having a desktop environment.
Equipment List
Required:
- A PC with an Internet Connection.
- Raspberry Pi
- Power Supply
- Micro SD Card (At least 4gb recommended)
- Micro SD Card Reader (If your PC doesn't have one already)
Optional:
- Ethernet cable (If not using WiFi)
- Wi-Fi Adapter (For older Pi models without built in WiFi)
- Case
Setting up WiFi and SSH on Raspberry OS
1. Download Imager
First we need to download the Operating System for our Pi. On your PC go to the official Raspberry Pi website and download the Raspberry Pi Imager:
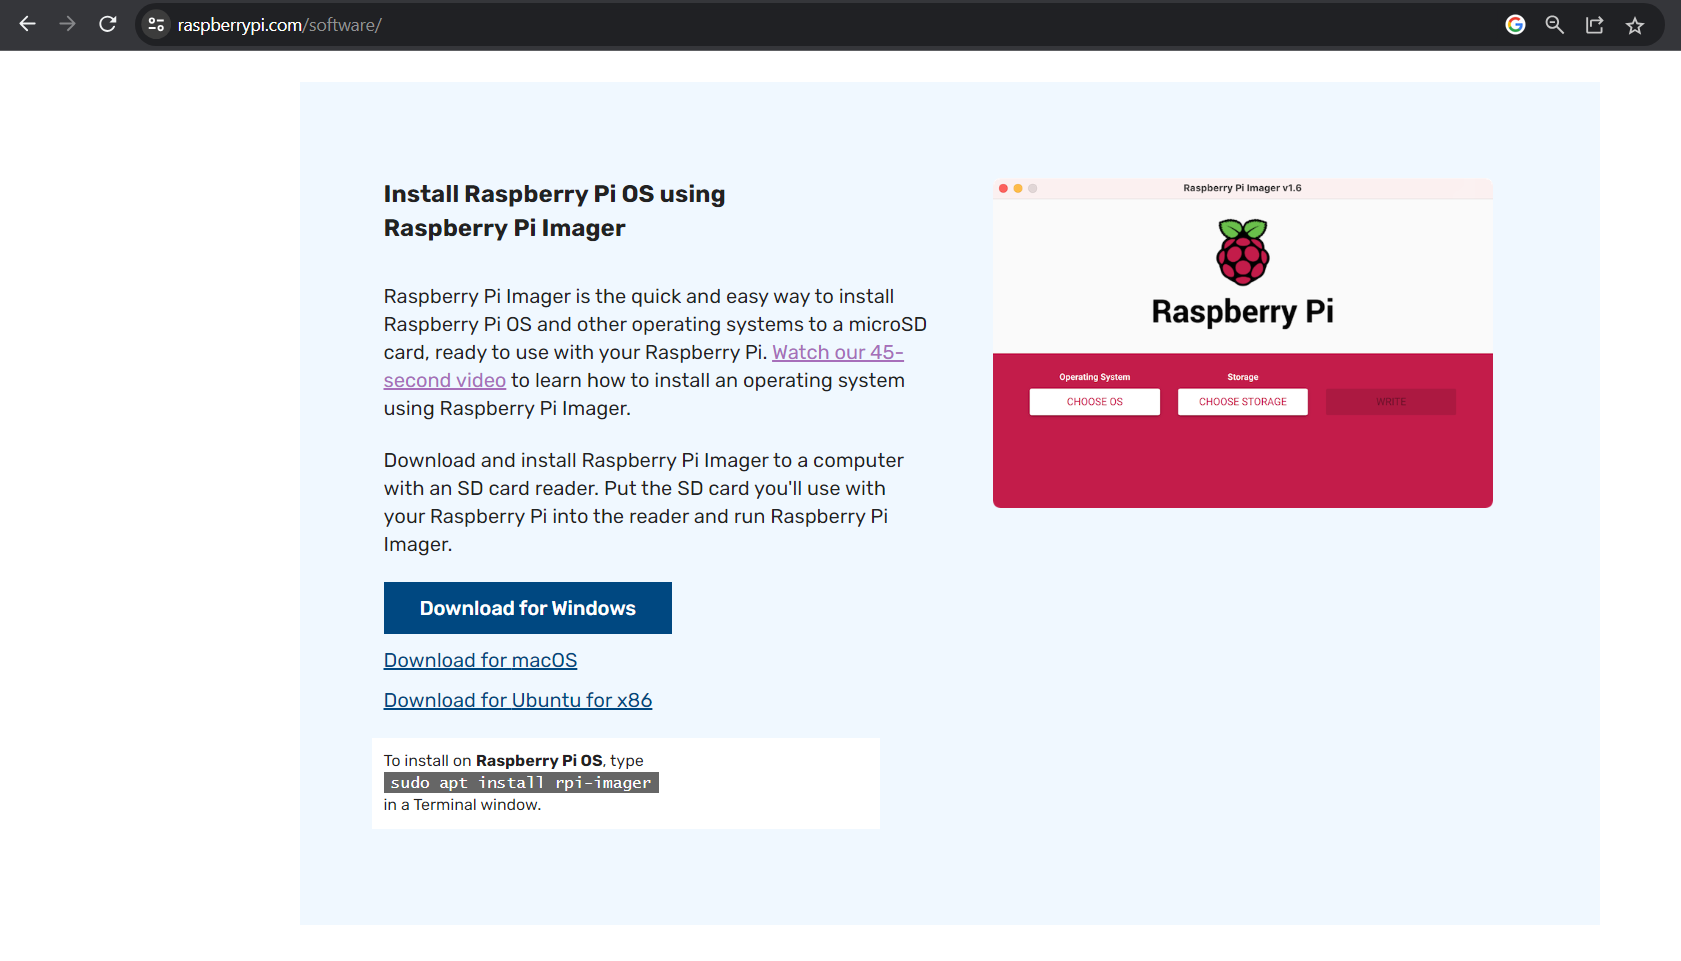
This will allow us to write the OS directly to our Micro SD card and also allow use to set up WiFi and SSH access so we can connect to our Raspberry Pi even if we don't have a monitor.
2. Choose Operating System
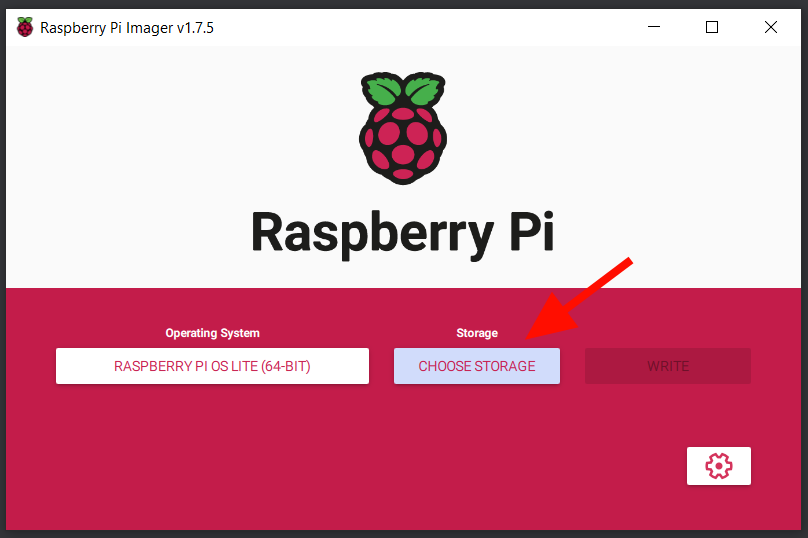
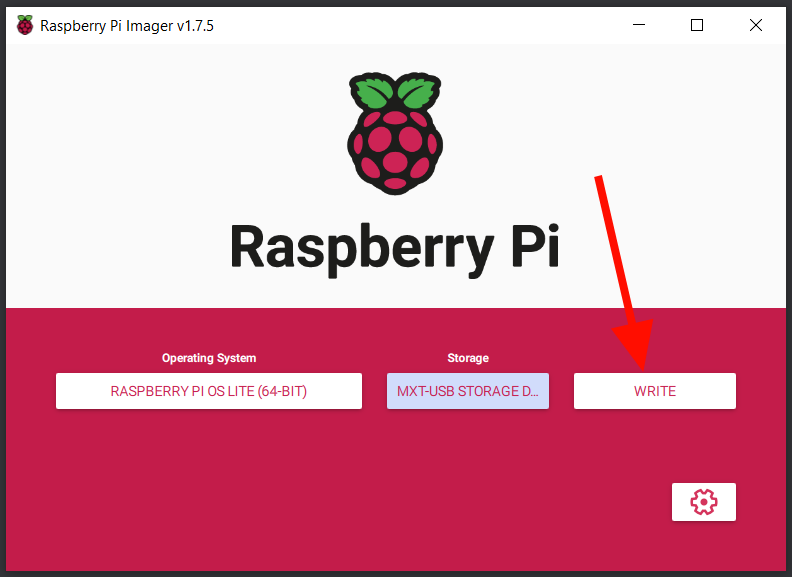
Once installed, launch the Imager and you will see something similar to this:
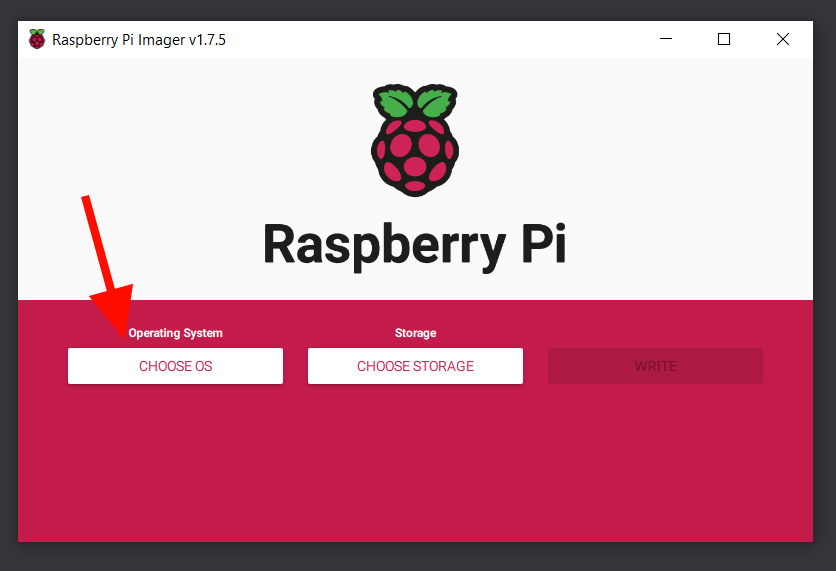
Now insert your Micro SD card into your Micro SD card reader and into your PC. Then select "Choose OS", and then select "Raspberry Pi OS (other)":
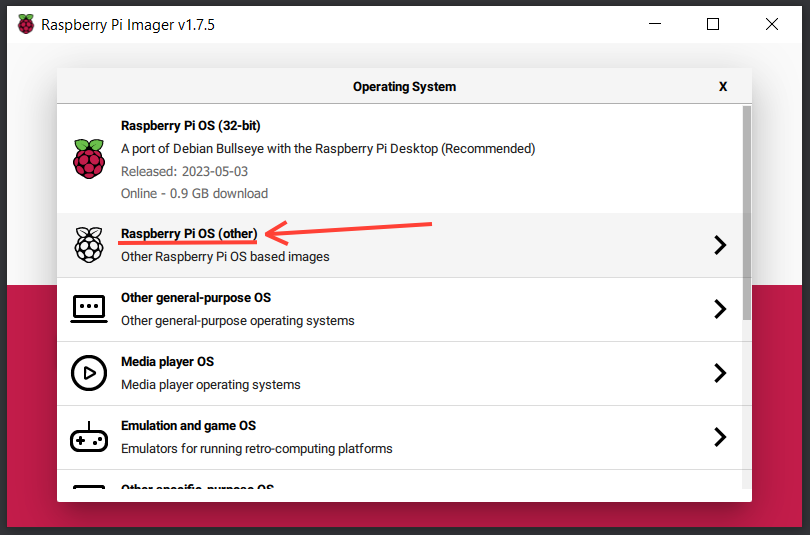
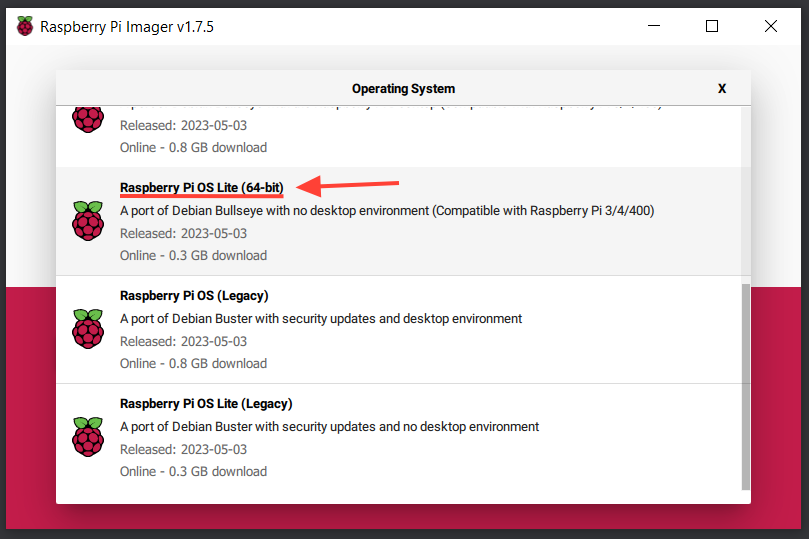
Then scroll down and select, "Raspberry Pi OS Lite (64-bit)". I am choosing the Lite OS because this is a Port of the Debian Bullseye OS without a desktop environment.
Depending on what you wish to do with and install on your Raspberry Pi the 64-bit versions may allow for better performance due to being able to access more RAM and it also performs better in CPU intensive processes. It also obviously comes with compatibility with 64-bit programs.
However depending on the version of your Pi, older models with older CPU's may only support the 32-bit OS due to their 32-bit architecture.
3. Choose Storage Device
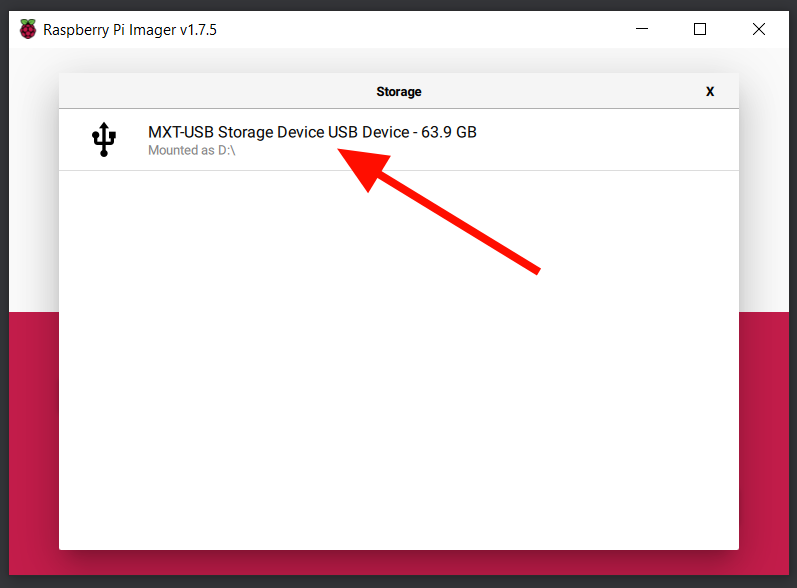
Once you've selected your OS you will be returned to the home page where you will now click "Choose Storage" and then select the Micro SD card you connected to your device earlier. If you are using an external USB Micro SD Card reader then it may show up as a USB device rather than a Micro SD card but don't worry as it will still work.
4. Setting up SSH on a Raspberry Pi
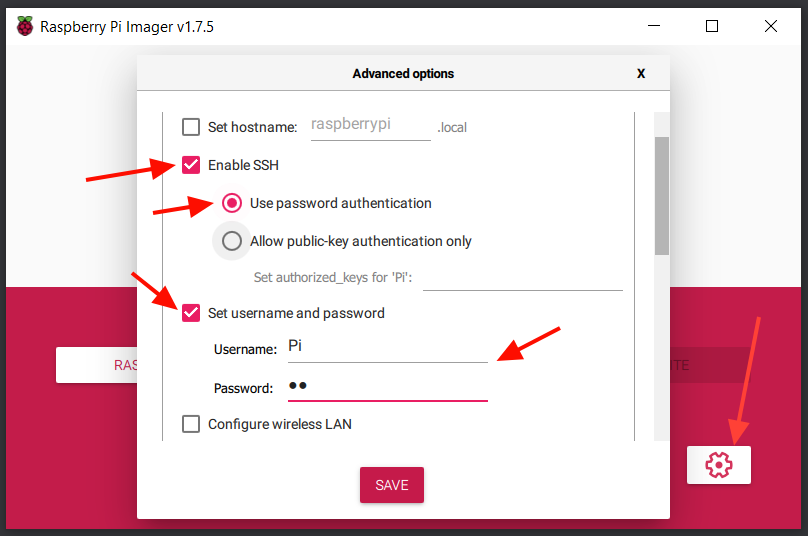
Now before clicking "Write", click on the settings button in the bottom right or press Ctrl + Shift + x to open up settings.
When the settings are open, check these boxes:
- "Enable SSH"
- "Use password authentication"
- "Set username and password"
Then enter a username and password that you can remember. These credentials will be used to remotely log in to the Pi using SSH.
5. Setting up WiFi on a Raspberry Pi
(SKIP THIS STEP IF USING ETHERNET CONNECTION)
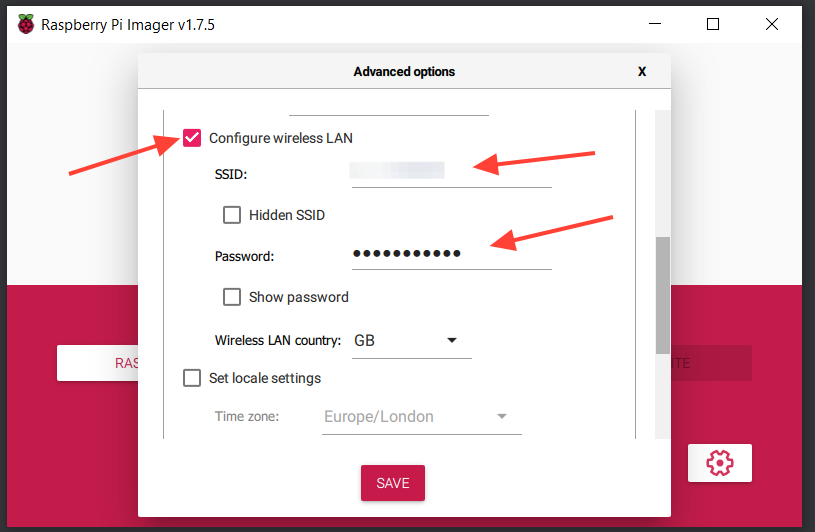
Before closing settings, scroll down from the SSH settings and check the box to "Configure wireless LAN" and then enter your network's SSID and WiFi password so that your Pi will automatically connect to your network upon booting up. These fields are usually auto filled from your current device's internet connection but if they're not then just fill them in yourself and click "Save".
6. Write Raspberry OS to Micro SD Card
Upon saving your settings you will be returned to your home page where you can finally click "Write" to write the selected Operating System and settings to your Micro SD card.
7. Power up the Raspberry Pi
Once the WRITE process is finished, eject your Micro SD card from your device and insert it into your Raspberry Pi. To turn on your Raspberry Pi, plug in the power supply and then insert into the USB-C power slot of the Pi and it will automatically boot up.
Don't forget to plug in your WiFi adapter for older Pi models or your ethernet cable into the Pi and the other end into your router if you won't be using WiFi.
Connecting to the Raspberry Pi
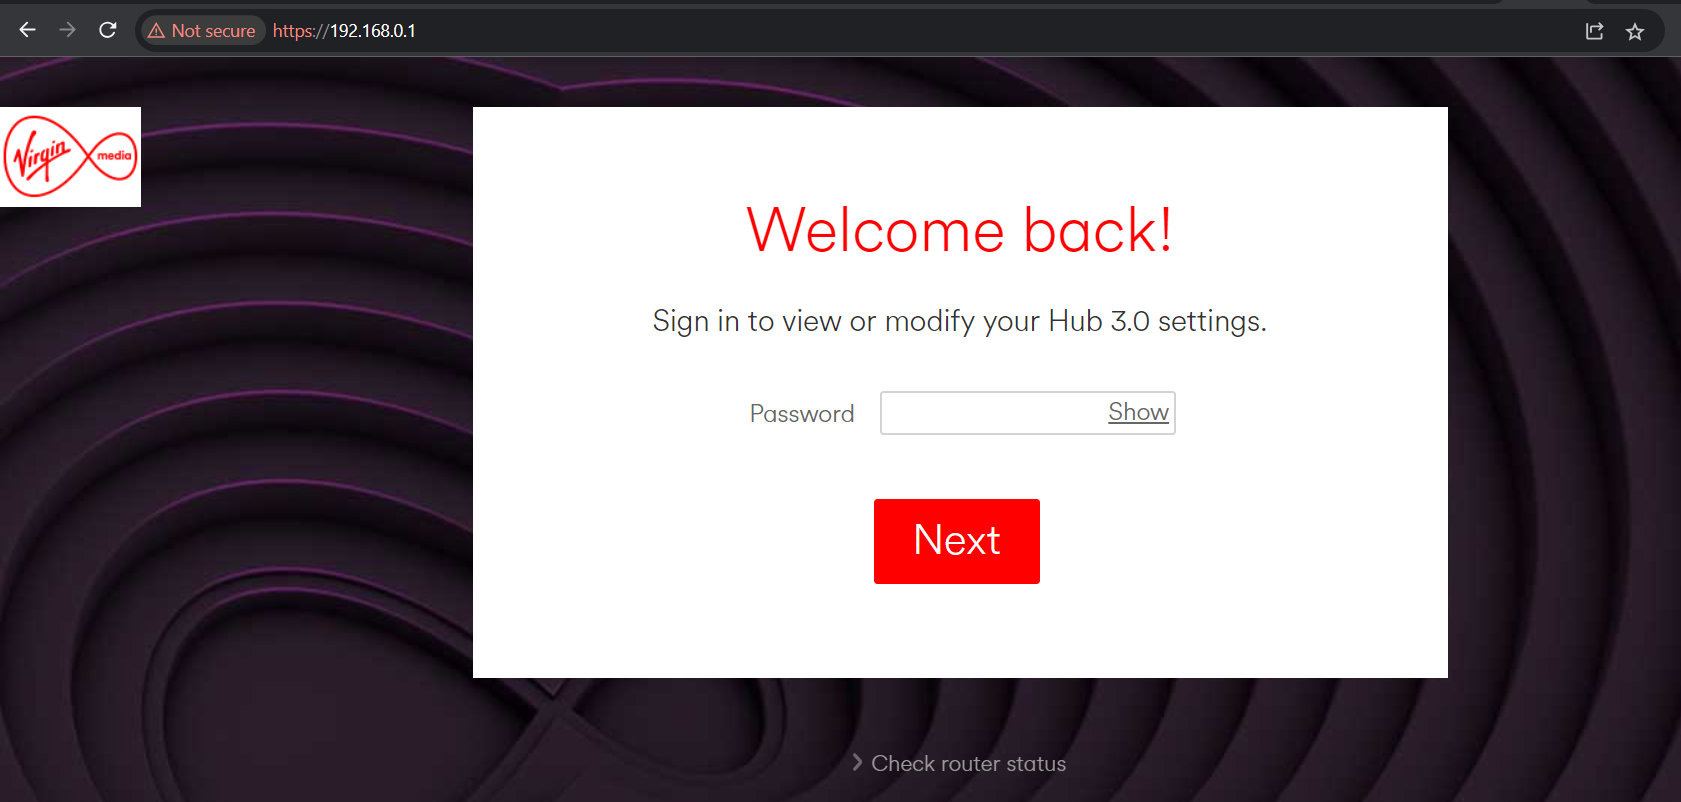
1. Accessing the Router's Admin Panel
To connect to your raspberry pi using SSH you must first know it's IP address. To find this out if you are using Lite OS and do not have a display for the pi, use another device on your home network to login to your WiFi router's admin panel.
This is usually accessible through typing the first host address of the network into your search bar, such as: 192.168.0.1
Yours may be different depending on your router and ISP but you'll be able to find it by searching up help and FAQ's from your ISP or Router manufacturer. Or you can visit setuprouter.com to see if they already have a guide for your router.
Once you have found out how to access your Router Admin panel, login using the password you set for it or the default password that is usually on a sticker on the bottom of your router.
Once logged in, navigate to the page that is usually labeled, "connected devices" and then look for a device which should be called "raspberrypi", unless you changed the hostname earlier in the settings of the Raspberry Pi Imager. Copy the IP address of the Pi and open CMD in windows or your respective command line/terminal on your PC.
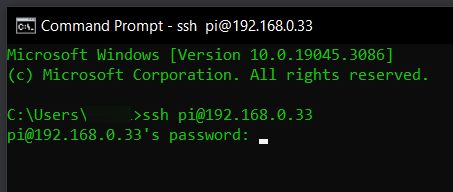
2. SSH into your Raspberry Pi
Type:
ssh {username}@{IPaddressOfPi}
The username is the one you set for SSH earlier in the Imager. Then press enter and then enter the password you set. The password won't show as you type it in, it will remain blank so you just have to make sure to not mess it up and then press enter.
If successful you should now be remotely connected to your Raspberry Pi through SSH and now see this:
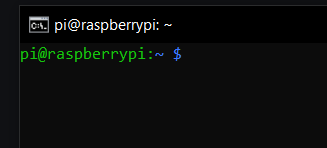
Now you are successfully connected to your Raspberry Pi, have fun!